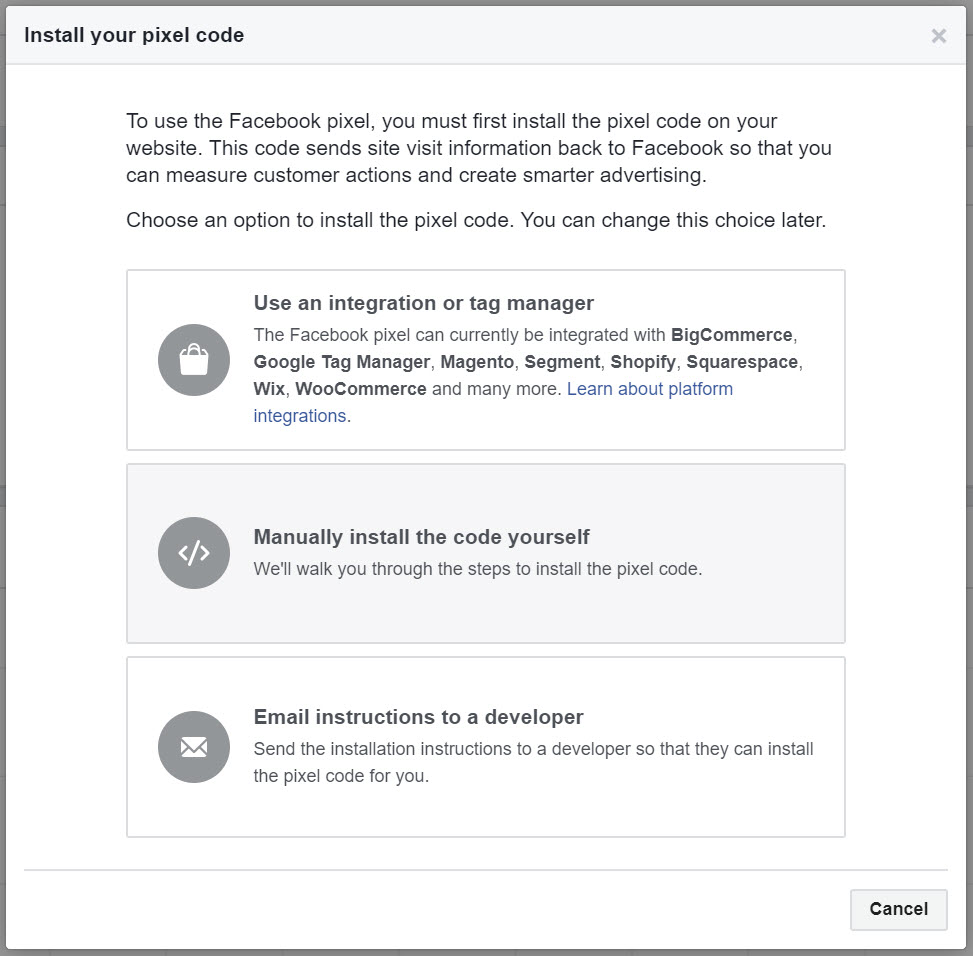
Install the main pixel code
To get started, navigate to ‘Pixels’ and click the set up button on the top right of the screen:
Head to ‘Pixels’ and find the Set up button
Select ‘Manual Install’ (or you can select ‘Google Tag Manager’ in the options above):
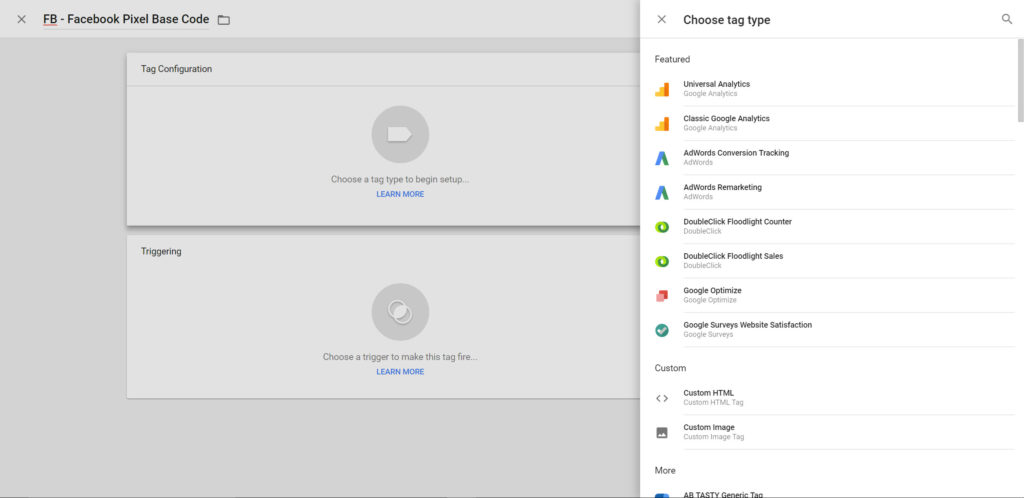
Copy your Pixel base code and head to Google Tag Manager.
Add a new tag, name it appropriately and select ‘Custom HTML’ from the tag type selector:
Paste in your Pixel base code:
And select ‘Once per page’ under firing options under the advanced section.

Choose the all pages trigger, before saving the tag:

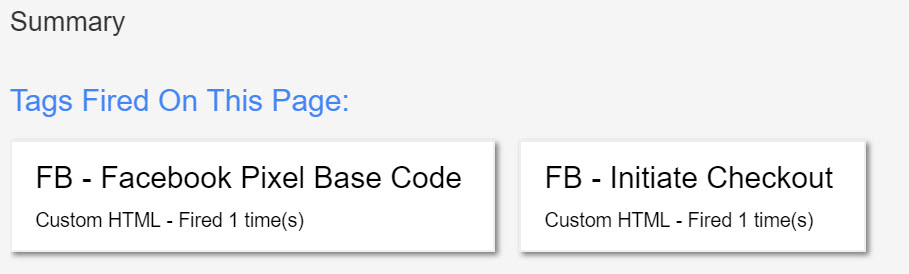
Once you’ve saved your tag, you can test in GTM’s preview pane before committing to live:

And of course, Facebook’s Pixel Helper:
So now you’re ready to push the Pixel live. Next, we’ll set up some events ready for your ad targeting and retargeting!
Setting up events with Facebook Pixel for retail sites
There are around nine useful events that can be tracked in Facebook Ad Manager:
- Search
- View Content
- Add to Basket
- Add to Wishlist*
- Initiate Checkout
- Add Payment Info*
- Purchase
- Lead*
- Complete Registration*
*Not covered in this article, sorry!
For each event, you need to configure a tag with the correct JS in GTM with an appropriate trigger for each. The trigger configuration might vary slightly depending on the type of retail platform you’re working on, although the approach to configuring them is roughly the same. We’re going to look at integrating events in their simplest form to get you started.
Search events
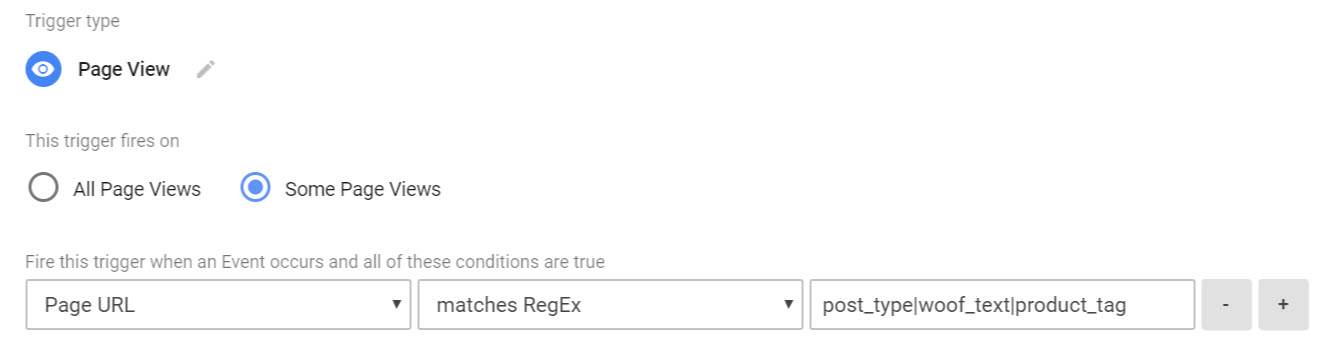
Search events are any session where the visitor used the search feature. In Woocommerce we have links to live filters that update the category page view. That, in our world is similar enough to a search that you could bundle them together. In other worlds that refinement could also just be faceted navigation refinement, but that’s up to you.
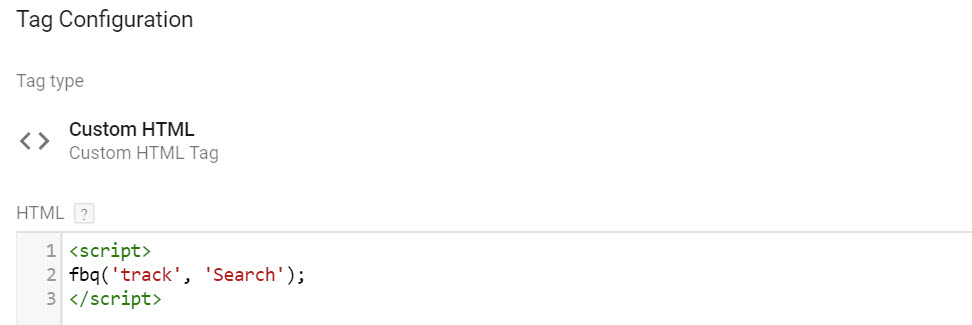
Create a tag with the following code:
<script>
  fbq('track', 'Search');
</script>>
I named this something like ‘FB – Search Event’
With the trigger as follows:
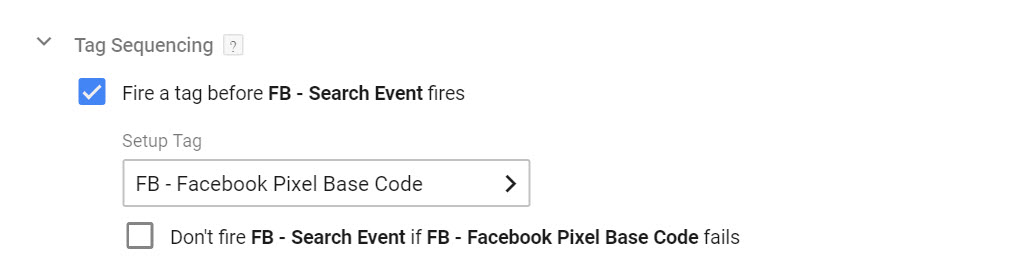
Don’t forget to set your tag sequencing so that the base pixel code has fired before your event. This is the same for every event snippet you’ll add, so don’t forget!
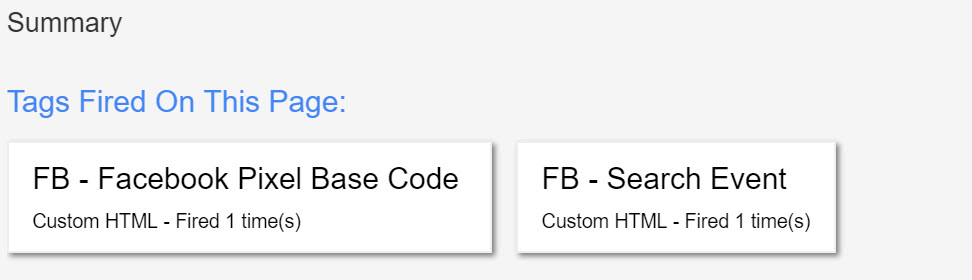
And finally, here’s the test result you’re looking for in GTM’s preview pane:
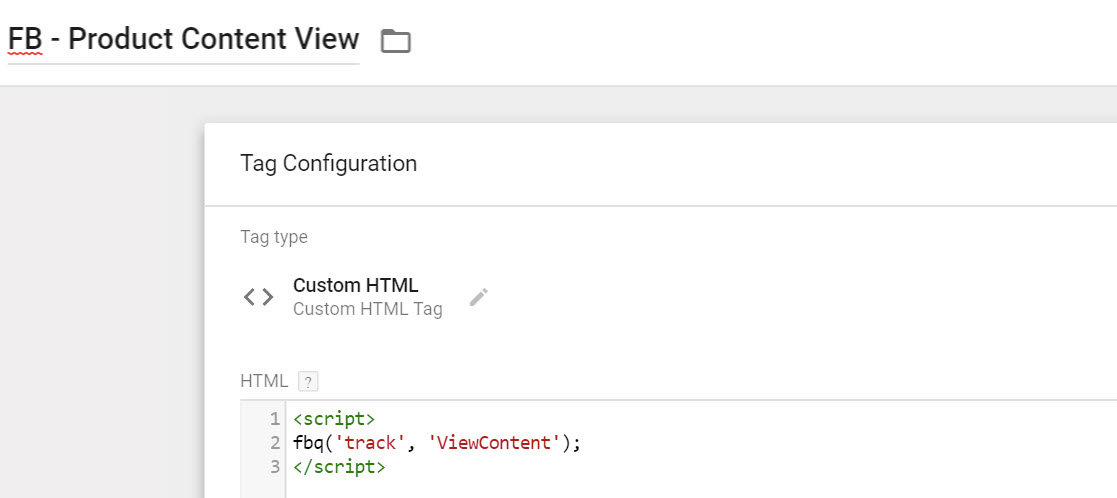
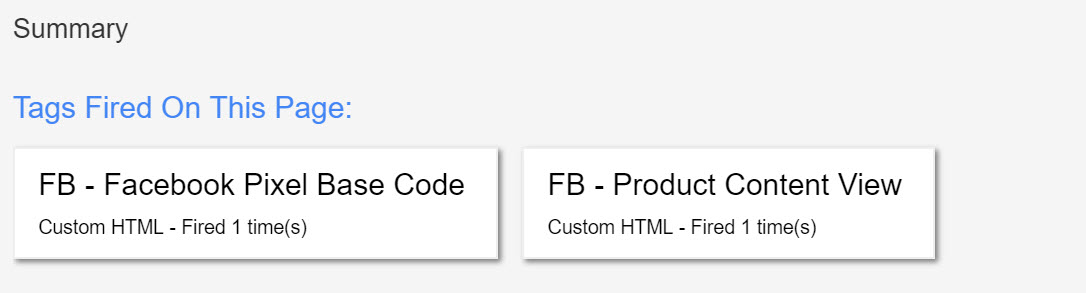
View content
‘View Content’ is a useful event label for any event where product details were reviewed.
Create a tag with the following code:
<script>
  fbq('track', 'ViewContent');
</script>
Naming it something along these lines:
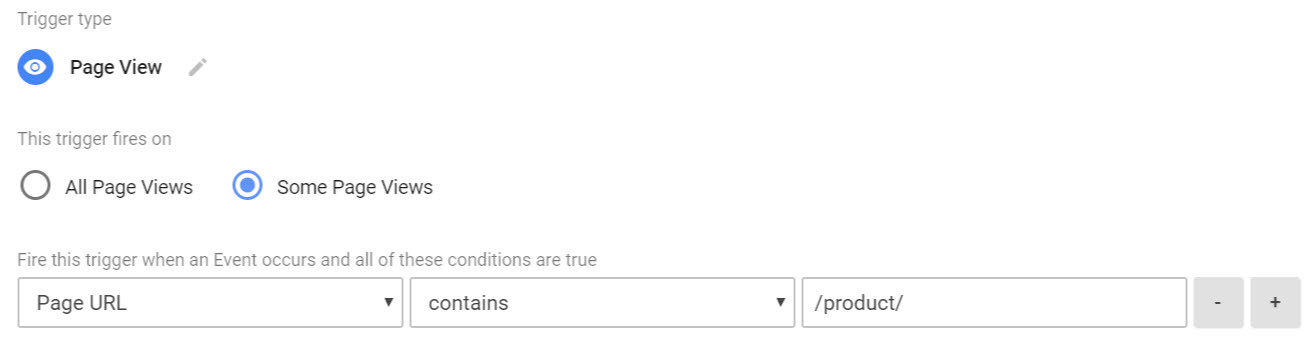
Don’t forget your tag sequencing!
And in our case, all product URLs helpfully belong in the /product/ subfolder, so the following trigger works nicely:
With the test result as follows:
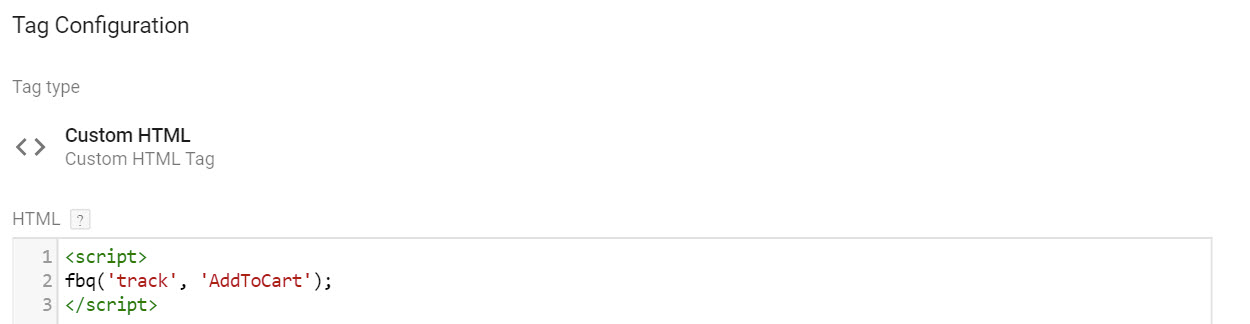
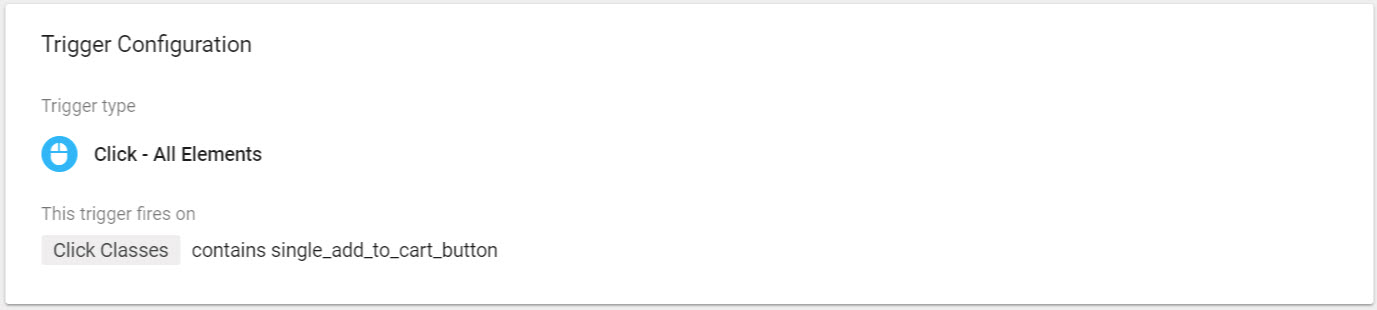
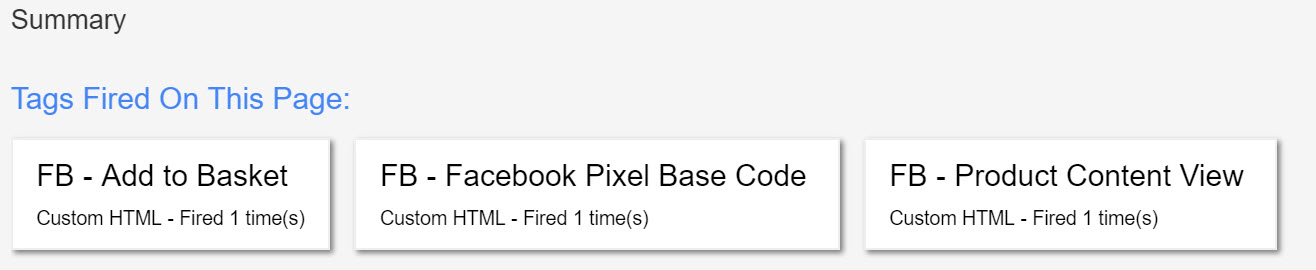
Add to basket
People who add to basket (but don’t purchase) can be added audiences for retargeting with this event. Super useful!
Here’s the basic code:
<script>
  fbq('track', 'AddToCart');
</script>
Which I’ve named ‘FB – Add to Basket’
My trigger is a click class event:
Relying on click classes and element IDs as trigger conditions can, of course, be problematic. For user interaction events, it is often far more scalable to use a combination of data layer variables and events, integrated using GTM’s custom event functionality. As well as avoiding ‘trigger-happy’ firing rules, your setup is less likely to break when changes are made to your site’s front-end. On the other hand, it does require you to have a deeper integration with your development team and a better grasp of JavaScript. For this reason, we’ll be sticking with standard click-based triggers for the purposes of this tutorial.
The trigger delivers the test results:
Getting there now! Next we’re going to initiate the checkout process.
Initiate checkout
Targeting people who initiated checkout, but didn’t buy is a potentially powerful thing. Sending them a discount code in an ad via Facebook is pretty cool, and you’re not training your entire customer base to expect discounts.
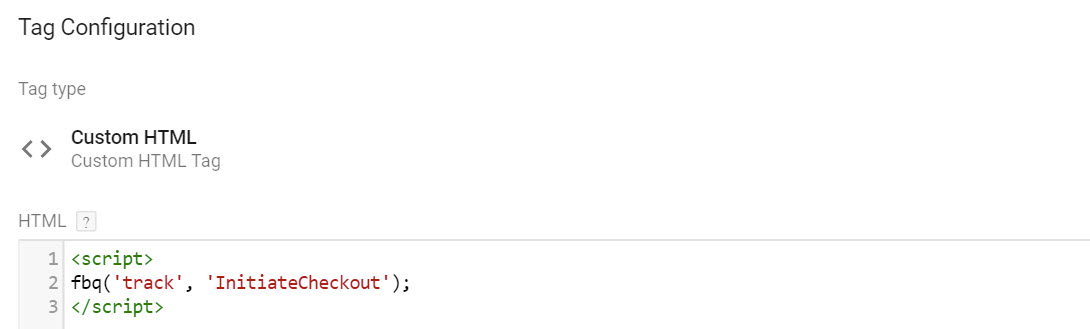
Your code looks like this:
<script>
  fbq('track', 'InitiateCheckout');
</script>
Which I’ve added to a named tag as follows:
With a trigger that looks for a click on a button with a class name checkout-button.

Again, don’t forget your tag sequencing.
And here are the test results you’re looking out for:
Purchase
We’re getting close to the end of our basic setup now, with a purchase next.
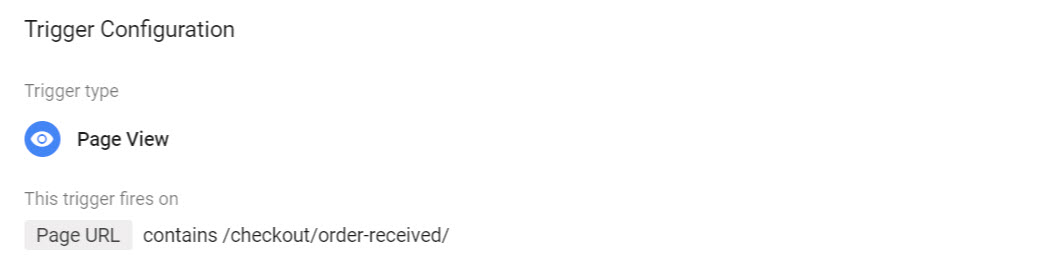
Purchases in Woocommerce are confirmed at the following URL endpoint: /checkout/order-received/ so matching this is pretty easy to do.
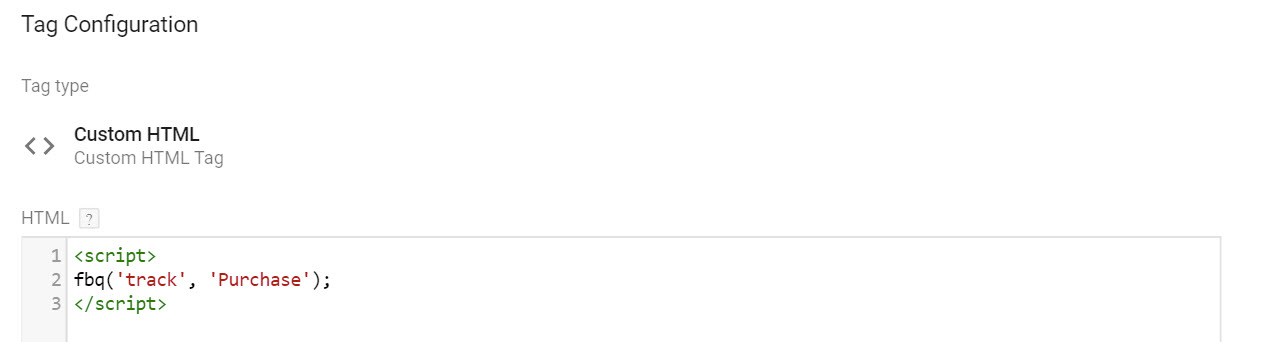
Here’s the event code:
<script>
  fbq('track', 'Purchase');
</script>
Which should be added to a tag as follows:
And a trigger based on the URL described above:
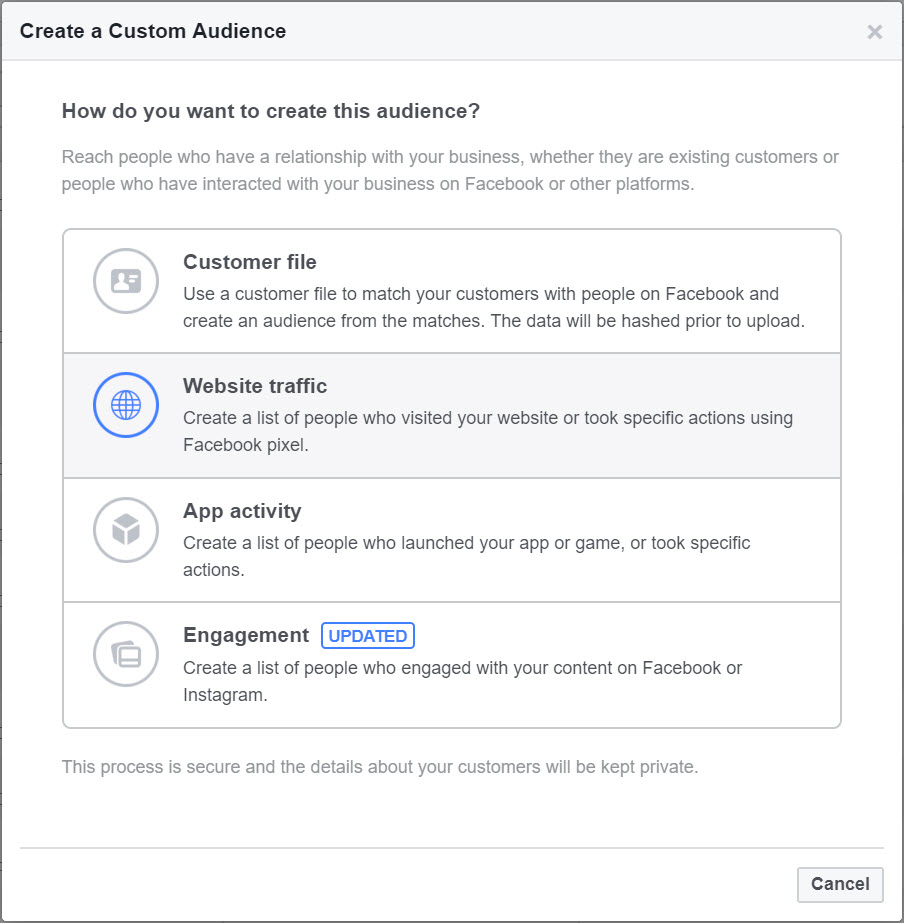
Custom audience creation
There’s a lot of powerful ways to pinpoint and target exactly the right audience in Facebook; and while this post won’t go into huge detail on that I will look briefly at setting up your first audience based on the events you’ve just configured.
Get started by creating an audience in Ad Manager, based on website traffic:
Here I’ve created an audience who added to basket or viewed a product, but didn’t go on to purchase. Swines!
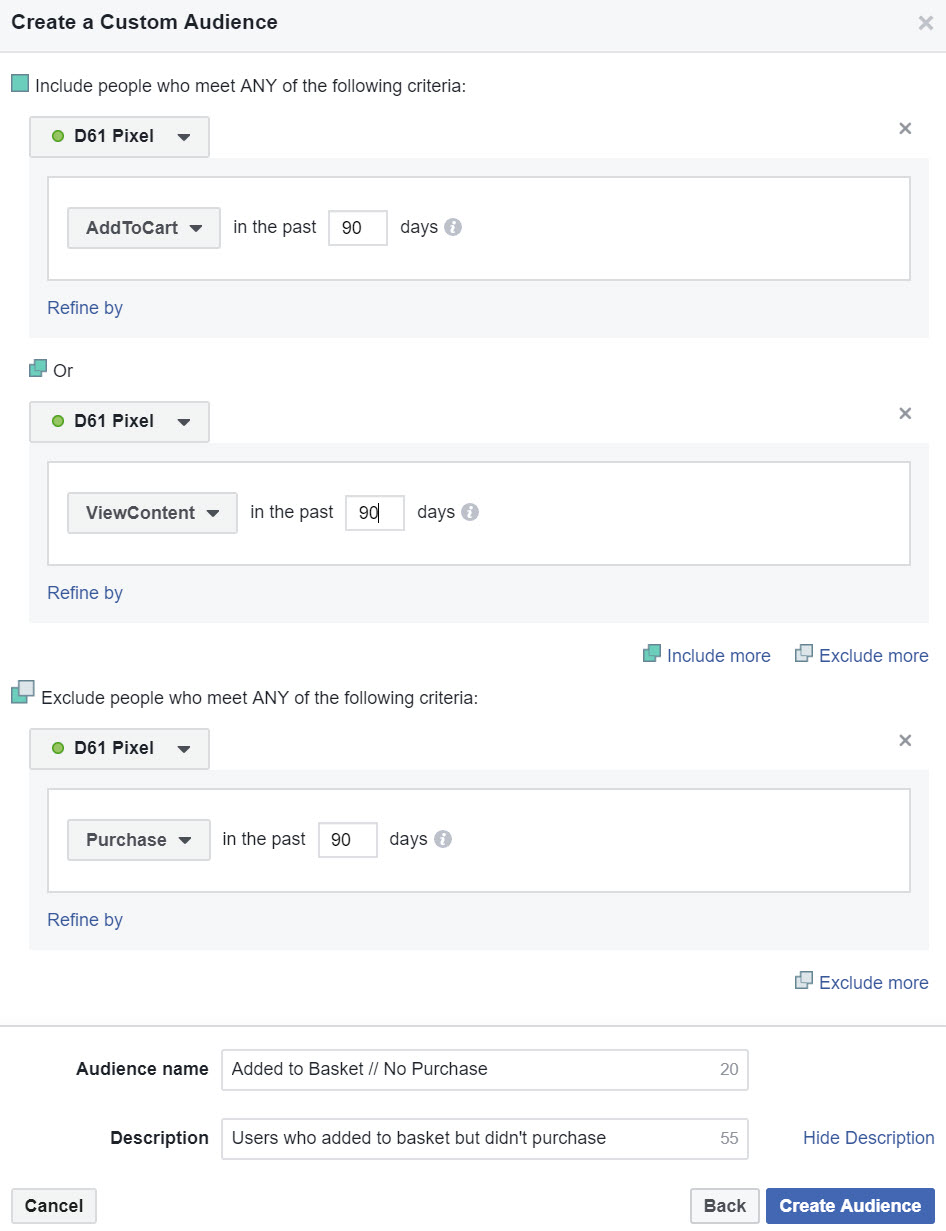
From there I can set up my ads to target these individuals and attempt to entice them back into my site. Very cheaply, I might add.
Good luck and enjoy the powerful new world of audience targeting that awaits!
Further reading
Here are some resources and references I used along the way:
https://www.apasters.com/blog/regex-guide-google-analytics-tag-manager/
https://www.simoahava.com/analytics/variable-guide-google-tag-manager/
https://www.analyticsmania.com/post/facebook-conversion-tracking-google-tag-manager/
Advanced:
https://builtvisible.com/manipulating-the-data-layer-javascript-variables-enhanced-ecommerce/
https://builtvisible.com/measuring-content-success-with-gtm/
